
The EICO 667 Vacuum Tube Tester
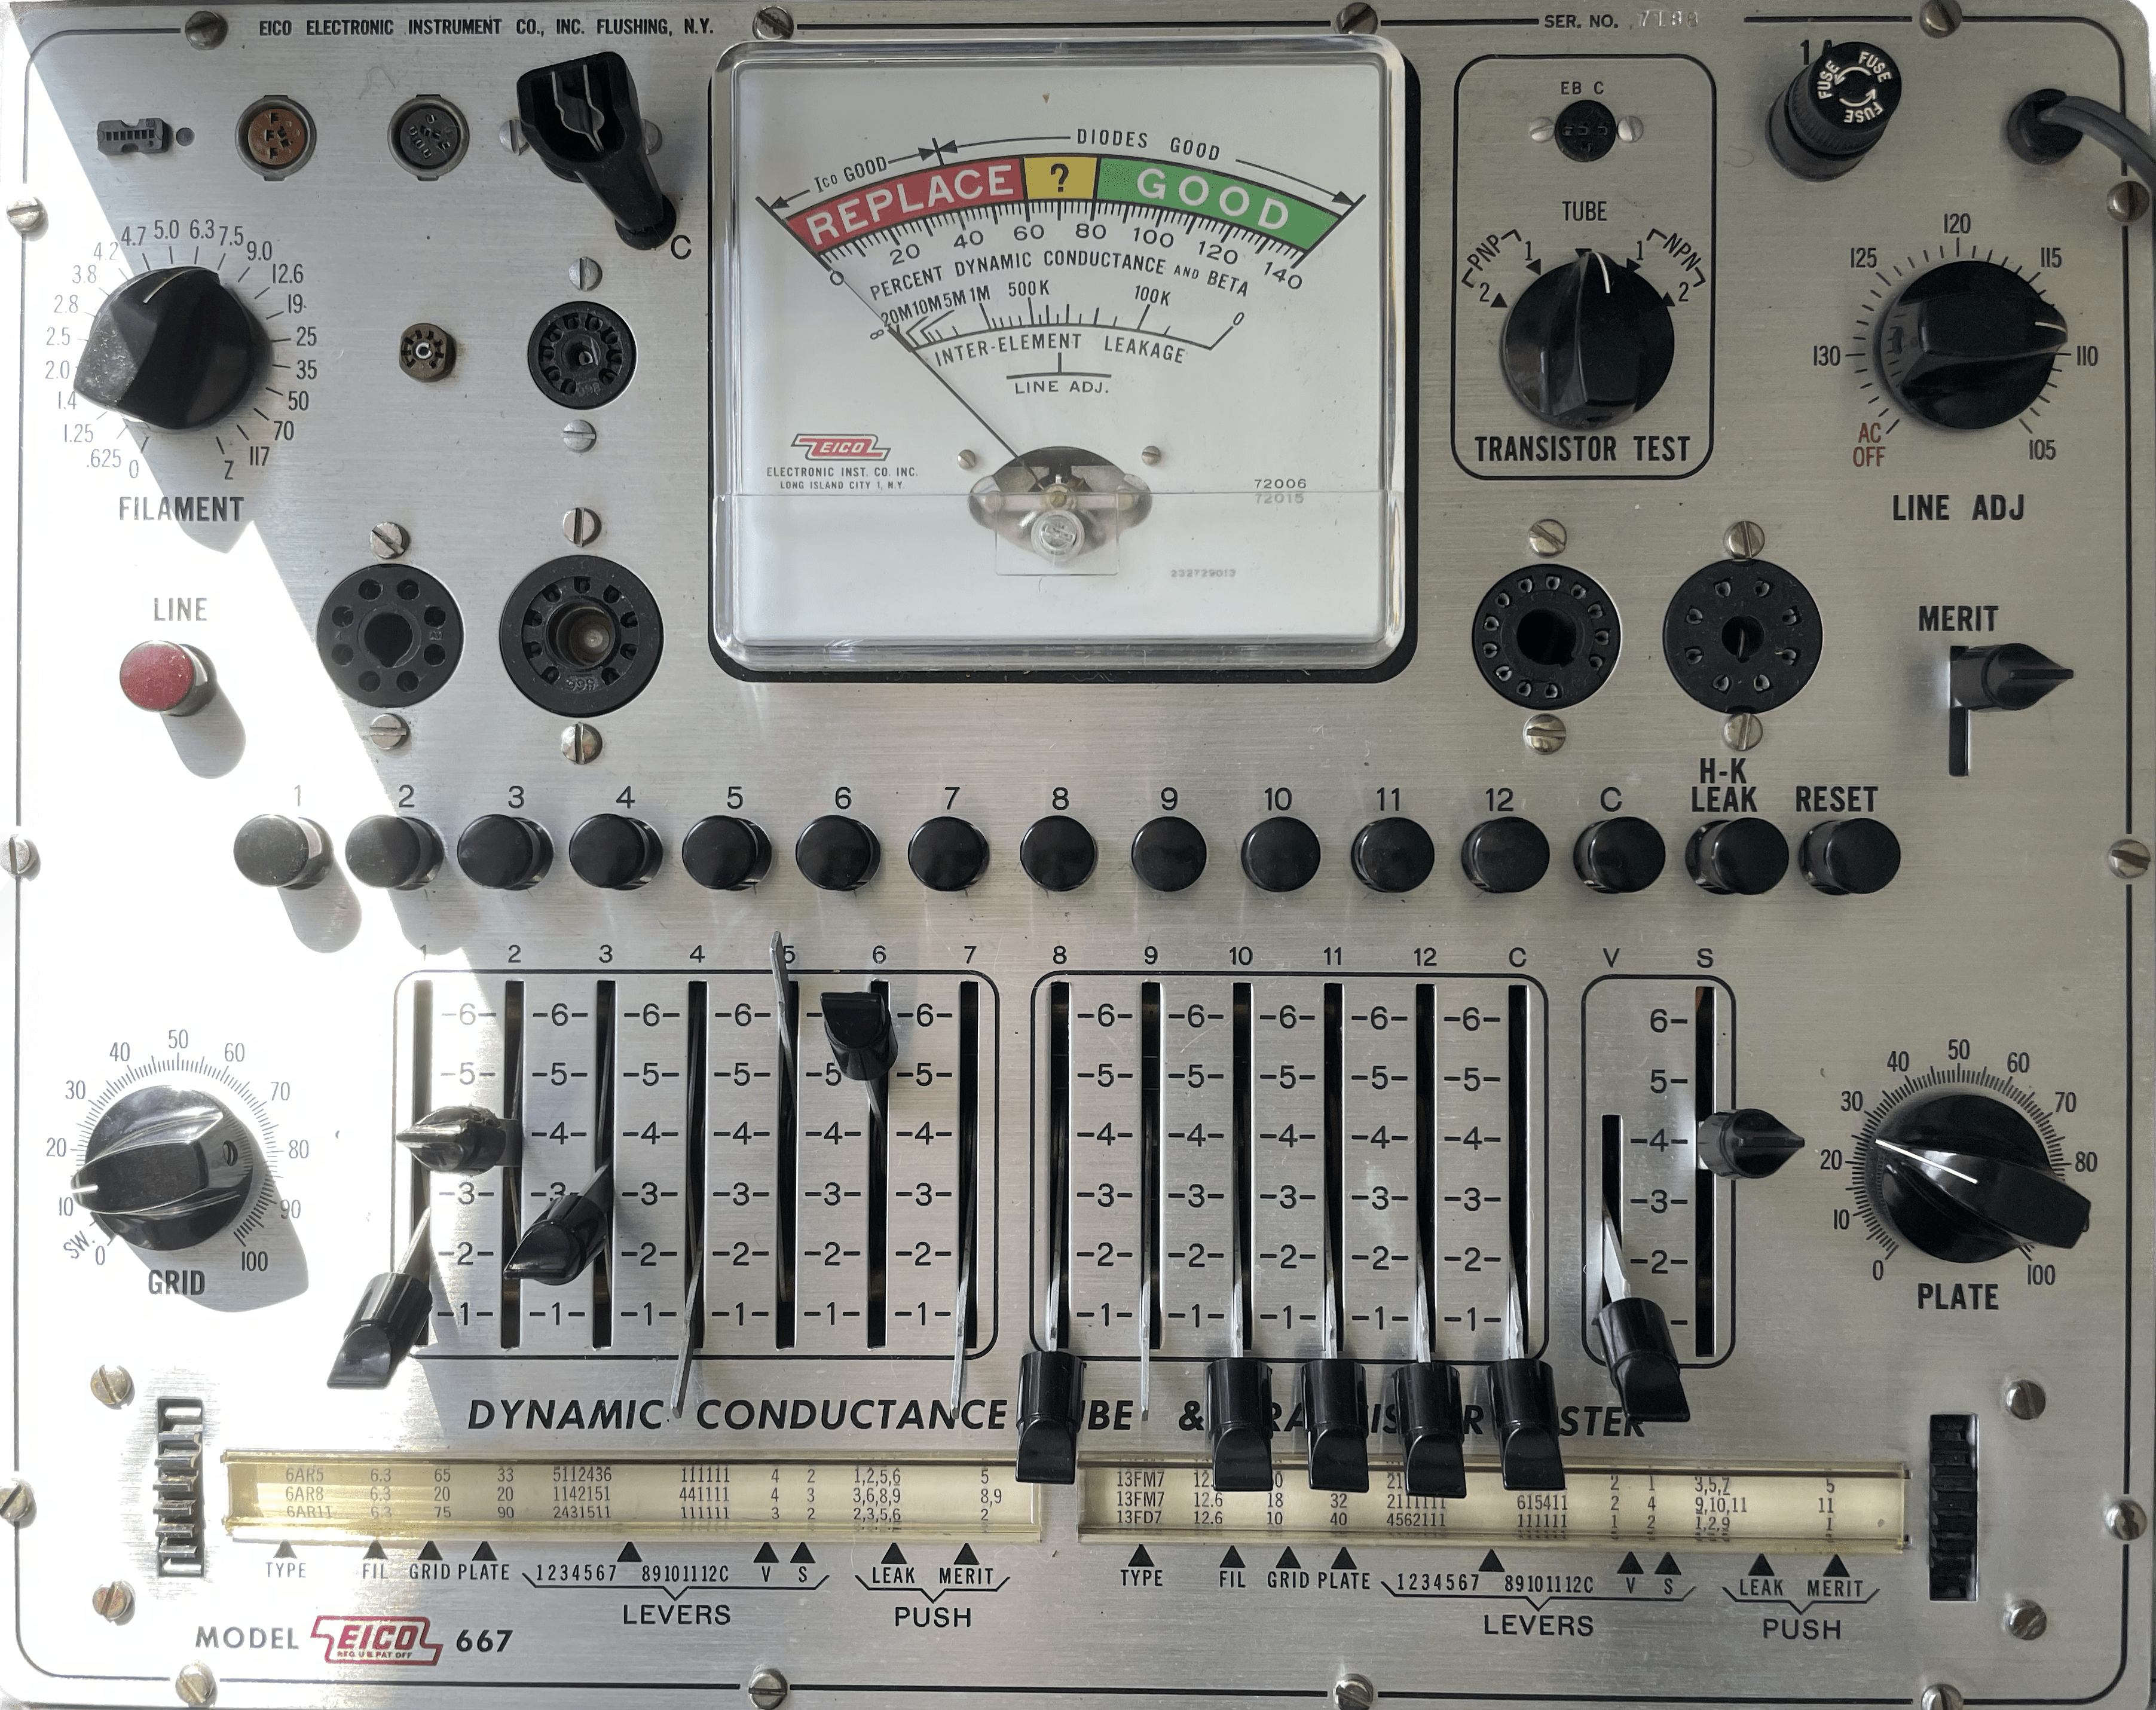
I was recently fortunate enough to get my hands on a workhorse vacuum tube tester, the EICO Model 667 Dynamic Conductance Tube and Transistor Tester.
For those of you who don’t know, vacuum tubes are amazing little piece of hardware that are similar in construction to lightbulbs and have served multiple purposes since the early 1900s across devices like radios, guitar and hifi amplifiers, and old CRT televisions, among other things (even some fighter jets).
How do you know if a vacuum tube is good? They’re made out of glass, and full of inert gas, and they’re fragile. This means that although they’re coveted for the famous “tube warmth” and richness they impart on audio systems, old tubes must be tested to determine their readiness for service.
How to Use a Vacuum Tube Tester
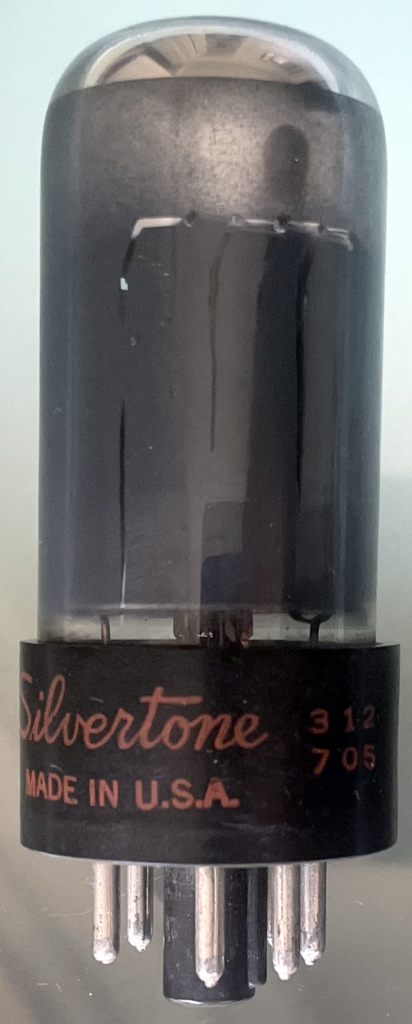
Misuse can result in damage to tubes (or the user) so please read the manual if you end up in possession of one of these. This example will use a Sylvania Silvertone 6V6GT, which works with 6V6 settings. The basic algorithm for testing a tube is as follows:
- Ensure all of the rotary knobs are set to their lowest possible values, turned hard counter-clockwise.
- Ensure all of the slider handles are set to a value of
1. - Ensure no tubes or transistors are plugged into the tester sockets. If they are, remove them before proceeding.
- Set the Transistor Test knob to TUBE (centered at 12 o’clock).
- Plug the tester into a wall outlet.
- Hold down the brown button at the middle-left of the control panel labeled LINE, then slowly rotate the LINE ADJ knob until the needle on the meter at the top-center is centered directly over the LINE ADJ. tick mark.
- Find the 6V6 in the tube chart (a list of settings for testing vacuum tubes) for the EICO 667:

Before inserting the tube, using the above chart, set the tester as follows:
- FILAMENT:
6.3 - GRID:
40 - PLATE:
40 - LEVERS:
6143562 111111 - V:
4 - S:
2
Once these values are set, insert the 6V6GT into the appropriate socket (for the 6V6GT it’s the first socket, directly adjacent to the LINE button pressed earlier during calibration). This tube happens to be “keyed” meaning it can only go in one way thanks to a notch in the base of the tube. Once the tube is in the socket, the LEAK settings (3-4-5-8) shown in the chart can be used. These map to the horizontal row of numbered buttons in the middle of the tester panel. In this case:
- Press 3, look at the meter to ensure the needle stays to the far-left at
0. - Press RESET.
- Press 4, again check the meter to ensure the needle stays at
0. - Press RESET.
- Press 5, check the meter again ensuring the needle stays at
0. - Press RESET.
- Press 8, check the meter again, ensuring the needle stays at
0.
The needle on the meter may jump a little bit during each button press, but should rest as far left as possible, on 0 every time. Any deviation from this could indicate a potentially faulty tube.
The H-K LEAK Exception
On the chart for some model tubes some LEAK values will have a line under them, like this, where 2 is underlined:

This means that in addition to pressing the indicated number, the H-K LEAK button also needs to be pressed. This should also result in a zero reading on the meter.
Merit Testing
The last thing to do is conduct a merit test. This is done by pressing the value indicated (in this case, 3), and then slowly pulling the MERIT lever forward. For merit tests, the needle should go well into the green GOOD section of the meter and stay there. Any tube that lands in the REPLACE or ? section almost certainly non-functional and junk. It’s also a bad idea to hold down the lever any longer than necessary as this stresses the inserted tube. One second or two is usually enough to complete a merit test.
Colophon
I wrote this guide for two reasons:
- When I originally acquired this tester it was pretty intimidating, and I wanted to be sure I was following the proper process so I wouldn’t damage any tubes or my tester.
- I have thousands of tubes that I have help testing and listing for sale, and needed to be sure my instructions were clear so that I could delegate this responsibility.
If you have any questions about vacuum tubes, testing them, or are interested in purchasing any rare and/or new old-stock (NOS) tubes produced between 1920-1980, reach out via the comment section. If you found this post interesting, you’ll probably enjoy The Visual Study of Vacuum Tubes.