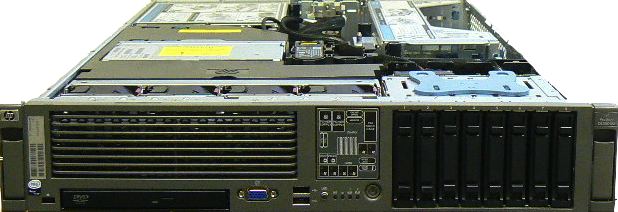
A bunch of tricky issues arise when trying to install Ubuntu Server from a USB drive. Also, there exists a bug in the GRUB installer that threatens to muck things up once you work through the issue of even getting Ubuntu Server installed. Today I’ll be describing how to fix all of these issues to successfully install Ubuntu 10.04 Server from USB media.

Issue 1 – The CD-ROM Drive:
While trying to install Ubuntu Server from a USB stick, the installer throws an error when trying to detect the CD-ROM drive on servers without a CD-ROM drive. I encountered this using Ubuntu Server 10.04.2 (Lucid Lynx) 64-bit, but in the research I did while troubleshooting this issue I found that people using all different versions of Ubuntu Server were running into this exact problem. Many posts to help forums have been made, but no solid resolutions have been offered.
Issue 2 – GRUB:
Ubuntu normally detects and installs GRUB (the bootloader) to the correct partition. When installing to a server running RAID5 (at least in my case) it puts it on the wrong partition.
My Setup
Before I start explaining how to fix this problem it’s only fair that I give you a quick rundown of my setup. This way you can modify or replicate my environment when working through this issue yourself. To load a bootable Ubuntu 10.04.2 64-bit Server ISO onto a 1GB USB stick, I used a tool called UNetbootin on my Windows 7 64-bit machine. This worked out fine, except it was throwing errors at me when I booted it on a HP ProLiant DL380 G5 in my home lab server cabinet. This particular ProLiant doesn’t have a CD-ROM drive. My more tech-savvy reader may wonder why I opted to use USB rather than a PXE-based netboot install. I fooled around with netbooting it, but I wanted the convenience of not having to depend on the availability of a TFTP server in the future should I need to set up another server. I like stand-alone solutions with minimal dependencies as as personal preference. Too many moving parts means complexity and with complexity comes painful troubleshooting, so I have a natural inclination toward simple, elegant solutions.
There are three parts to the resolution of this compound issue. The first actually involves correcting an issue with the filenames on the USB stick, the second involves setting a boot option during the boot of the USB drive, and the third involves fixing GRUB, which for some reason, Ubuntu installs to the wrong partition. All steps must be completed to consider this issue resolved.
Step 1: Fix the Filenames
After creating the bootable USB drive in Windows (using unetbootin), we access the USB drive under My Computer and navigate to /pool/main/l/linux on the drive. In here will be a bunch of files with a .udeb extension. Notice that almost of them end with the .udeb file extension, but a few of them don’t. This is a problem. We can fix them by renaming anything that doesn’t end in .udeb to .udeb. I don’t know why unetbootin truncates these filenames (it could have something to do with a character limit in Windows pathnames), but this will fix that issue. We can now eject this USB drive and plug it into our server.
Step 2: Type in the Required Boot Option
The next issue with CD-ROM drive detection can be resolved quite simply. The work-around is to add
cdrom-detect/try-usb=true
as an option on the kernel boot line. By doing this, the Ubuntu installer will allow the USB drive to function as install media, rather than going haywire when it realizes the CD-ROM drive it expects to see is not present.
Step 3: Fix GRUB
None of the aforementioned steps will have much of an effect if we’re not able to boot our freshly installed operating system. If this last step isn’t performed, we will be able to get through the entire Ubuntu installer process, and when we reboot, we’ll sadly be greeted by a blinking cursor and nothing else. To turn what would otherwise be a major issue into a minor annoyance, we need to tell the Ubuntu installer where GRUB should be, since it obviously guesses this incorrectly when left to figure this out automatically.
To do this, we boot our server from our USB stick again, and choose Rescue Mode from the boot menu. This gives us a handy option that allows us to manually install GRUB to a partition of our choice. We need it on /dev/cciss/c0d0, which is our RAID array.
Once GRUB is installed on /dev/cciss/c0d0, the server can be rebooted and we’ll be greeted by a login prompt, indicating success.
Leave a Reply